In this blog post you will find my notes from the 2024 Nienhuis Retreat and the lectures from some of Europe’s best AMI Trainers from 0-18. They are incredible women with decades of experience who have trained hundreds of teachers around the world. They are Patricia Wallner, Madlena Ulrich, Carla Foster, and Jenny Marie Höglund. 💛 💛 💛
PDF Versions | 0-3 | 3-6 | 6-12 | 12-18
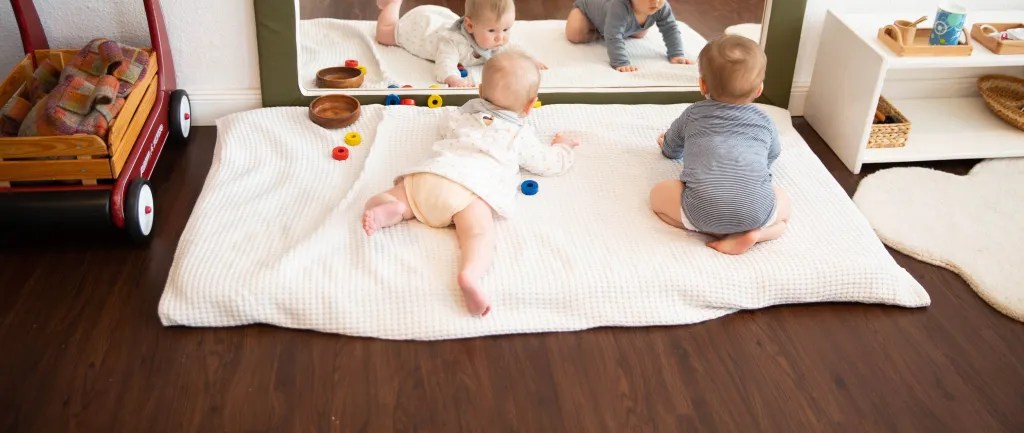
freedom & limits in the first 3 years of life
notes from Patricia Wallner’s lecture
- The ages 0-6 and 12-18 are stages of creation – during which freedom and limits are necessary for the formation of the individual.
- Freedom is something everyone wants – economic freedom, professional freedom, spiritual freedom…. But we cannot do anything we want without consequences. The limits are those that we accept within our community (family, school, neighborhood…world) and learn to live within.
- In Montessori, as it should be everywhere, the child has the freedom to move, to stay on a task as long as they want, to order one’s own actions, and to develop their will.
- Of course, as the child’s freedom expands, as do their responsibilities and need for self-discipline, but fundamentally their freedom is of that of the individual to have unlimited possibilities for growth and improvement. This freedom should be the basis of human society.
The only true freedom for an individual is to have opportunity to act independently.”
– Dr. Maria Montessori, Education and Peace, chapter 7
- Adolescents have the freedom to develop into a fully functioning, independent adult. This is a process which begins in the first 3 years of life.
- The toddler’s journey to freedom begins at birth. The toddler has the freedom to work with their hands, to find functional independence, to do practical life tasks, to fall asleep when they are tired. There are built-in social limits to learning how to be social, but within those limits – there is a lot of freedom.
- The child does everything to become an individual of their time and place.
- Everything is tied by protective laws which render freedom possible. Fish are the most free of the living beings in the world, yet they cannot get out of the water.
- Dr. Montessori describes physical freedom as to be free from the teacher and the parent, free of being under constant influence of another person. They must be free from being dependent. Dependence destroys personality. {Education and Peace}
Organic freedom in necessary to sustain physical freedom (maintaining and sustaining the body).
Then psychic freedom becomes possible. For this an education which follows the laws of development is required with a guide who knows what is psychologically appropriate for each plane and how and when to work with them through each milestone.
Then comes intellectual freedom which is spiritual and intellectual independence, or the birth of the adult.
- Freedom is an exercise of the the will, making choices based on understanding. But freedom is not a gift to the child from the adult, but the child’s own conquest.
- Nature provides babies with a vital impulse that drives them. The parent is happy to do everything for them, but the baby fights to roll over, to pull up over and over, without anyone telling them to.
- The child in their first 3 years of life is called the unconscious creator – one who doesn’t know that they are learning. Gradually the reasoning mind catches up with the unconscious mind and from 4 years old, the child is guided by the reason. The reasoning mind is present from birth, but it is not in control. The child develops it through living and building their knowledge, knowledge they start absorbing in the womb.
- The vital impulse driving the 0-3 child to learn is called their Hormic will. This and their Absorbent Mind allow the child to incarnate everything they need to learn and everything we want them to learn, such as the rules of life and language.
- How the child is born and raised will always be the most comfortable way for them to live because this is what they have incarnated. They will learn more through life, but nothing will have the same long term impact like the unprejudiced way in which they absorb their own culture, for example.
- When parents teach rules by saying “No! Stop!,” this is the way they will teach rules to others. Active discipline is when the child is in control of themself – when they are internally motivated to follow the rules. 0-3 year old children don’t understand the whole world, so parents still need to give the rules so the child can adapt to wherever they were born (language, habits, food, climate….). The child is open to everything and develops their own discipline. The adults in their life have to model everything the way we want them to do it.
- Children watch us all the time. They have 86 billion neurons. They are listening even when you whisper. The Absorbent Mind takes in everything. Children repeat what we say. That’s why even as an adult, you might find yourself saying something your mother always said to you, even without intending to. You incarnated that as a child.
You have to set limits, giving just enough information so the child knows what you are talking about. ‘You must walk inside. We can run outside later.’
“Do not fear to destroy evil. It is only the good that we must NOT destroy.” – Dr. Montessori
“If there is some child who persistently annoys the others, the most practical thing to do is to interrupt them.” (Dr. Montessori, The Absorbent Mind, ch. 27)
“A child’s liberty should have as its limit the interests of the group to which he belongs. We should prevent a child from doing anything which may offend or hurt others or which is impolite or unbecoming.” (Dr. Montessori, Discovery of the Child, ch. 3)
Don’t allow child to MISUSE the materials. Allow them to USE the materials.
Be aware of how you stop chaos. Act. Don’t react.
Adults can make strong connections too, even without the Absorbent Mind. The way you interact with children will get stronger and stronger with practice. Teach yourself to use certain phraseology. Adjust yourself to the child’s level. You won’t have to think about it. Train yourself to interact in the right way and model correctly when you are with the child.
Babies CAN concentrate. As long as they have the right materials in front of them.
“Let us remember that inner discipline is something to come, and not something already present. Our task is to show they way top discipline. Discipline is born with the child concentrates his attention on some object that attracts him.” (Dr. Montessori, The Absorbent Mind, ch. 26)
- Toddlers need more time to process information than other age groups because their language is more limited than other ages. You can only say one thing to them at a time, no sequences. Speak slowly. When you put on coats, don’t talk about where you are going, wait until you are on the way. Give information and repeat it.
Let’s go downstairs…… We need coats …………. Which hat do you want to wear?………. Let’s go to Grandma’s house………….. Do you want to walk or ride in the wagon?
- Not every child in the world has to look at you while you are speaking. You should know if they are paying attention, whether they are looking at you or not. That is an archaic Western tradition.
- Around 2 years old, the child is completely separate from the parent and the Ego is formed. Their favourite word is ‘No’. They want to be heard. They want to have a say in everything.
You can put on your coat. Or I will help you put on your coat.
NOT Put on your coat or I will leave without you. (Then you will have to actually leave without them. Which you won’t do. So you will lose your credibility.)
This only applies to children under 3. - What do you do if the child rejects your idea? You have to set the limit. Tell them nicely:
Please stop kicking the wall. Either you stop kicking the wall, or I will help you move away.
Speak to the child the way you would want someone to tell you to stop kicking the wall if you were having an emotional breakdown. - Set rules simply by saying:
We don’t climb on the table.
We don’t run in the kitchen. - With a toddler who can understand more complex language: set the limit, explain the choices, think the situation through, and assist the child to comply.
More about Patricia Wallner’s work HERE
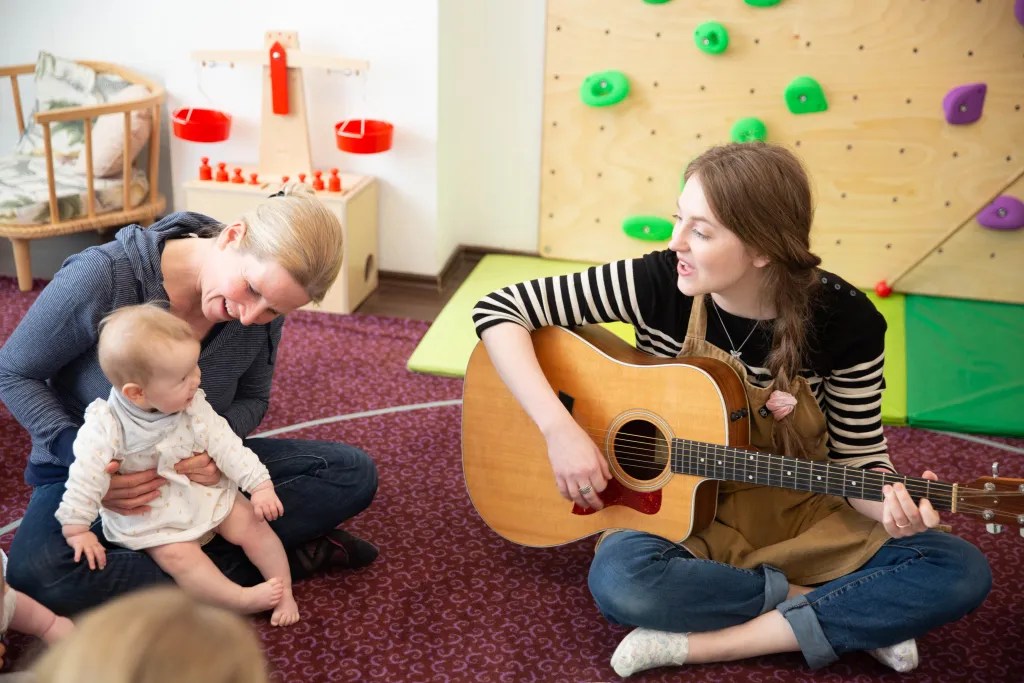
freedom & limits from 3-6 years old
notes from Madlena Ulrich’s lecture
- In order to be able to follow limits and show responsibility, the child must develop the will so they can relate to the rules that are applied to our group.
- The will is the desire or inclination to do something. Willpower and will are often used interchangeably, but they are different.
- Will is the inclination but will power is the power to direct the will to do something or continue to do something in the face of hinderances or distractions.
- When we do something “of our own free will” it means that we have done it voluntarily and it also means we have considered options. Do I do it or not? Exercising your will means you have considered options and have made a choice.
- Self control is the ability to regulate your thoughts and behaviour in the face of temptations. We have the ability as adults to give ourselves little rewards if we show signs of self-control. If I do that, then I can do this. Before I watch the news, I will finish this assignment. After I finish this task, then I will have a cup of tea. You use the will to push away distraction, but still require a reward after.
- Being strong-willed is sometimes considered to be a negative trait by adults when a child is not doing what the adult wants them to do, if a child does the opposite of what we want or is hard to direct and need rewards or punishment to do what the adult wants them to do. However, we also admire people with a strong will, those who have risen above society.
- Montessori thought a strong will is a positive thing. It means that you have a strong connection to your own will and your own needs, whereas a child with a weak will might allow themselves be guided and and will follow their peers or obey orders.
- In Montessori we believe that we should help the child to develop their will, to become in charge of their own actions, to be able to stop themselves from doing what they are not supposed to do and challenge themselves to do what they must.
Practical Application:
- Lots of children’s games are about training the will and executive functions.
- The Montessori classroom allows the child to be able to focus on what is essential and to be able to adjust their own feelings and emotions.
- We use our will to calm ourselves down and to wake ourselves up and to adjust.
- We encourage the children to practice creative problem solving. What is plan b.,c., and d. and how can I adjust?
- The child should learn to trust themselves and to build their self-esteem. Without self-esteem the child might not act upon the will. Strengthening their will power builds resilience, allowing them to continue their work even when they make mistakes.
- The child needs to have a feeling that they are doing something deeply meaningful.
- Babies can’t control their emotions and need to build up these skills in order to regulate their actions in 3-6.
- During the first year of life, the child doesn’t have control over their hormone system. Their sense of external feeling of safety is given to them by the adults in their environment, for example the calming and singing voice of their father.
- When they become toddlers they begin to learn how to be aware of and regulate their emotions.
- At age 2, the will starts to form.
- We can see that the child’s actions are not based purely on impulse, but on a decision. Now that the child has found their will, they exert it as much as they can. For a toddler it’s new and they don’t know where or how to use it. They tend to over-use it. They say “no” to every question. This is actually a very important stage.
- At this beautiful and exciting stage, the child is becoming aware that they have a will. It feels to them like they could change the whole world with the word ‘no’. The child with their new power needs to practice the use of their will. This coincides with the maturation of the prefrontal cortex. I want a cookie but my parents told me that I can only have a cookie after dinner.
- A child’s development in this area is very dependent on the caregiver. The child may have a strong will but it is still hard work to use that will in the face of temptation. It’s even hard for some adults.
- Practical life activities provide the 2-3 year old child with the intelligent direction of movement. These materials are essential in the development of the will. I am moving my hands over the table with the soapy water to eventually cover the whole table with suds. I am building the pink tower by moving one block at a time. I am going to continue scrubbing that whole table until its washed and then I will continue tidying up until everything is back on the shelf.
Support the child’s will with enthusiasm.
Give the child time to make their decisions and don’t give too many choices.
Obedience:
- Obedience is the ability to regulate yourself and to follow the needs or requests of someone else.
- Blind obedience is not a good thing. But the child must learn a willingness to listen to others, consider what they say, and decide whether or not they should act upon what they said. Obedience really means that the child knows they need to do something and they can do it, even if they don’t want to because they know that it is important. My teacher says we need to tidy up our work – I don’t really want to, but I know it’s true.
Levels of obedience:
- level 1: the child obeys if their needs are in accordance with the requests.
- level 2: the child obeys as long as you don’t turn your back.
- level 3: the child obeys without being asked, because he sees the needs.
Development of the will:
- level 1: instinctual behaviour of the newborn that needs the adult to build up the ability to self-regulate
- level 2: deliberate action when the child starts noticing the needs of other and occasionally acts upon them … if they feel so inclined at the moments and then around 2 it turns more into internal motivation.
- level 3: the child becomes aware of the impact of his actions on the environment. If I push my friends while we are standing in line something unpleasant will happen and that’s not positive so I am checking myself even though I am impatient right now.
When the child is not doing what we want, we must consider which stage the child is in the development of obedience and their will. that development and ask ourselves, “Do my wishes line up with that child’s?” Some children have been given very little opportunity to regulate their will. For example, some adults think that a little child should not have to struggle with are putting on their socks or putting their own work away. This child may consequently have a delay in their development of will and obedience.
Respect child’s pace.
Respect child’s ability to self-correct and to build self-confidence and resilience.
Observe.
Respect the child’s concentration.
More about Madlena’s work HERE
freedom & limits from 6-12 years old
notes from Carla Foster’s lecture
- We are responsible for our freedom.
- Dr. Montessori defines freedom as an environment which is conducive to the most perfect conditions and the freedom which allows life to develop.
- If this is not obtained, then the child’s adaptation is based on captivity.
- Experiment:
Teachers went to children in small group and asked the children what they thought freedom meant. The children had a primitive understanding that it is just doing what they want. We thought about what assumptions were the teachers making when they say you have freedom here as long as you take responsibility. They hadn’t talked to the children about what lies beneath that freedom and responsibility concept. - Children need activities that require effort. With every gained trained movement, you gain a freedom of movement. It’s always effort even when it’s easy.
- For the child of 6 years old, much of their learning has seemed effortless. They seem to have forgotten all the times they fell down when they were learning to walk.
- We often forget all the effort we went through to learn what we have. Now this current effort is tiresome, because I am conscious of this effort and it seemed effortless before. But this consciousness of their effort brings them to a new level of responsibility the ability to plan.
- Planing brings the potential of purpose.
- There’s also considerations to take: people, time, constraints, resources.
- Talking to the children about effort, purpose, and consideration is perhaps more fruitful than talking to them about responsibility.
- In the second plane there are emerging characteristics that help them to answer the question, “why are we here?”
- They become aware of laws like gravity that they must adhere to.
- The child has a lot of work to do in just 6 years in order to do all the things that an adolescent can.
- Now we have a world economy and a literate society a world that demands much more than our brains were designed to handle. We can’t abandon this because it is us. Now we have to teach children to read and write, but the child is in this realm of adapting to the world. WE have to be much more creative than the institution of education has ever been to make ourselves stuarts of the earth and units of humanity.
- Each of the human tendencies active on the second plane has a practical and a spiritual manifestation – not just will or obedience, but the practical application of them.
- Responsibility is not discipline. Freedom is not a reward for obedience.
- We must not have just a friendly attitude toward error but we have to embrace error.
- We must pay attention to the needs of the environment and the needs of ourselves.
- As adults we can keep on working and finding these strengths that we received from nature at around 6 years old and build on them.
- These strengths appear as fragile potential, not as full-blown skills. We must help the child develop these skills.
- You will have very few rules in your classroom and they will be organic.
- If you are constantly making more rules, you are you’re on the wrong path. You need to be releasing rules and promoting effort, purpose, and consideration.
The child at 6-12 is a robust explorer. They are learning about courage and fear, they challenge, they distance themselves from family.
- This can be frustrating for the family. Trying to get away from family, having all this energy at school and struggling to be contained inside is a sign that they are being limited in their space.
- There’s a thrill in going out into the unknown and experiencing fear. For the 6-12 year old it is strange to feel mixed emotions. Being courageous is not without fear.
- Curiosity can be an antidote to fear. Let’s get curious and ask questions. Let’s love our environment. That helps us get up in the morning and conquer our fear of the next morning or the next year.
- Packing, planning, organising with the peer group can be an antidote to fear. This makes it obvious to be a robust explorer.
- The world is so complex now and the guidelines are not clear. WE need to make the child’s path clearer for them.
- Children need challenge. They need different kinds of challenges and they need to reflect on different kinds of challenges, talk to someone they don’t know very well, take a role they haven’t filled before, learn about challenges, face challenges, and discover the purpose of challenge.
- Without the absolute natural laws there is no freedom. Laws are foundational to existence. This makes a child curious: if a snowflake needs laws to exist then what laws do I need in order to exist? That’s why I’m here: to develop myself according to these laws. I must develop my body and mind to ask the why and find the answers.
- Imagination becomes really important. We unite the how and why with imagination to talk about early humans. We say to the children: we humans are like this because this is what humans are. You have the same creativity that the first inventors had.
- Reason and imagination are not just there suddenly. They have been growing through the first plane out of the home.
- Time becomes important. How humans have always considered, wondered about and measured time in different ways. We have always been obsessed with time.
What does it mean to live and grow and die?
We have been making stories about this forever and ever. WE must help the children to face this so instead of taking the time away from them because we think they need endless time but put them into a flow that helps them understand what times passing means. - We start at 6 years old by thinking, “what does time passing mean?”. We write down the times and discuss what a child has done in a specific quantity of time.
- They don’t have endless time; they have 6 years. A child doesn’t know what their own pace is until they are challenged.
We don’t talk about children working at their own pace because that is a synonym for having endless time, which is an escape.
We talk about effort, purpose and consideration.
- We talk to the child: What steps have you taken? Are you ready for the next step?
- We don’t tie them down to a particular thing. Okay, you’re interested in planets, you go look at planets and we’ll come back in a couple days and discuss what you can do with this. Now you want to do a play. Okay.
- For 6 year olds, things just grow and at some point they just stop. The child writes “…the end” if they just get tired of writing. In this case, don’t tell the child to go back and revise. The skill of revision comes later. Let them be done. When they are ready to revise things, then you can encourage them to revise.
- They will emerge their desired project but it will not come out immediately. WE have to help them with their own process.
- We have to talk with the child about all the work they did, how they divided the labor, how they made a problem to find the solution, what happens when we kept our materials in order and were able to cooperate and reflect….. If we don’t do thes then the child doesn’t see the efforts they have made. This is the Big Work – this is them owning their own efforts, purpose, and consideration. Then the child can mobilise their will for the next challenge.
- Monotonous repetition kills will.
- Repetition is important, but monotony makes the child avoid work, initiative, and challenge.
- We need to minimise control of error and become our own controls of error. That went really wrong lets figure out why.
- The child is exploring awe and wonder. They have complex emotions about feeling small, yet significant. Plants do amazing things and adapt to the environment. Plants are amazing, and humans are also amazing. Music is amazing…
- Enjoy the freedom to act independently and to feel awe and wonder.
Justice:
- We all know a child who thinks that if they lost a game then the game was unfair.
- Distributive justice is good for mathematical division but not great for social cohesion. A 9 or 10 year old, thinking like this is not prepared for society.
- Children can understand if you explain the different ideas of fairness to them, the distribution of equity to help some correct a disadvantage/ to make the playing field more equal.
- Restorative justice is when a child sees that if they make a mistake or wrong someone, they can make it right again. Most society believe that if someone wrongs us than an external party will make it right. But we must help the children keep the idea of interpersonal experiences. Give the child time to cool off, mobilise the reasoning mind, and consider what needs to be done in order for the relationship to build back stronger.
- These discussions increase children’s freedom and responsibility.
- Discuss what communities they are a part of, what does being a part of that community does for them and what do they do for their community. When you discuss the classroom community it becomes apparent that there are a lot of things they can do to be a part of their communities.
- We must create opportunities for a child to find new parts to play and contributions to make to their community.
- When a child’s behaviour shows limited experience, it makes it apparent to the adult that they are in a cage.
- Sometimes we have this idea that a child should never be evaluated or self-evaluate negatively. But the child is always evaluating and comparing themselves to others, so we must help them to do it honestly.
- Help a child recognise their issue or stuck point and then inquire if they need help with it.
- Help the child understand that whenever you know something, it is your responsibility to share that with the community. I know how to draw a lizard does anyone need a lizard. I know these math facts, I can help with those.
- When you form groups, keep in mind how each individual’s strength will be revealed and interplay.
Fear is the enemy of freedom and responsibility.
Conflict must not be banished from the classroom because it helps the children understand themselves and others.
Bring the child to a consciousness of his own dignity and he will feel free.
Have a collective goal. Math facts are not just for each individual child. Literacy is not just for each individual child. It is a group effort to propel ourselves froward in unity.
More about Carla’s work HERE
freedom & limits from 12 – 18 years old
notes from Jenny Marie Höglund’s lecture
- Children from 6-12 years old have a reasoning mind, but abstractly.
- Adolescents have a reasoning mind.
- The child was born into a culture, but now they are born into being part of society and they need to be free from their family.
- They need a good foundation in first 12 years of life planes, so they are firmly based in their culture. Then they will be separated from their family in order to be able to attach to something else.
- The environment itself must be changed in order for this attachment to take place.
- It’s very different from the prepared environment 0-6 and 6-12. They need a mindfully unprepared environment. It must be restricted within certain rules that give the necessary guidance.
- The adolescent has to discover these rules, supported by the adult, to create their OWN social organisation, community, and ability to work together. This creates their limits.
The environment must promote not only the freedom of the individual, but also the formation of a society.” – Dr. Maria Montessori, Education and peace, ch. 14
- Purpose is important because it keeps the adolescent motivated and gives them energy and the opportunity to give their best to others and have a positive impact on their community. This is what they need to experience.
- They need loyalty. The work is not done until all the work is done. If one finishes one part, you don’t leave your friends, you go to your friends and help them finish their work.
- It is the work that gives them the energy and knowledge and understanding that they have a common purpose.
The ownership of accountability:
- The adolescent is accountable for their choices, work, and responsibilities. The freedom is that of the community, a code of conduct and civility of the social organisation that is set up by the adolescents themselves together to have a harmonious community.
- The adolescent learns what freedom is in a social context: the freedom to participate in the social organisation with discipline and accountability.
- Each adolescent is responsible for themself and their role in the community.
- A higher self control must happen when you live and work in a group. It isn’t all about the individual anymore and requires more self discipline that develops out of the needs of the group/social organisation.
In speaking of the [adolescent] child we are now dealing with the manners and rules of social existence, and we come to the need of the laws regulating work and exchange….” – Dr. Maria Montessori
- The child doesn’t have the same kind of responsibilities or consequences as adults. We find this out though observation.
- Observation has to be done constantly. Adults jump in and interfere constantly because the adult is faster. In order to give the child what they need, we have to step back.
- For adolescents, we sometimes have to facilitate difficult situations, but usually they sort things out themselves. They only want affirmation and support from the adult.
One of the things the adult should practice is the observation of different mental states of the child and the actions which accompany them.” – Dr. Maria Montessori, NAMTA Journal
- We are a source of information to the child on values and language use. We don’t have to use the child’s language. We want to stretch their vocabulary and we want them to feel confident in the adult conversations they will have and in academic environments.
- We offer them demonstrations so they can become independent of the adult and feel capable in an adult setting.
- The adolescents have a community meeting every week, which is a formal meeting with a set agenda with a chairperson and secretary. They can venture issues, discuss rules they come up with, discuss problems, discuss moral dilemmas, come to consensuses with guidance for their community…
- Through literature or reading seminars, they find out about the adult world and themselves. They ask questions about human interactions and what can be behind different moral codes.
- While they are reading a novel they can explore their own value system to see if it agrees with the characters in the novel.
- The adult must be very observant of the relationships, interactions, and language in the community. You may say to an adolescent “If I were you, I would rephrase that.”
- If an adolescent is being rejected by the group, it needs to be addressed by the child, with the support of the adults. The adult helps the adolescent to be aware of their choices and that they are accountable for their actions.
- Discipline is not imposed by the adult, but they are reminded of it by their peers.
- Limits are not set by the adults, but by the adolescents themselves depending on their expectations of themselves as members of a community. The adult gives a framework for them to set limits.
- Setting limits with adolescents is different because you can’t pick up a teenager off the table if they put their feet up on the table! You don’t have to do anything, but the school manager could take the table away as a consequence. They need to respect their space. If they respect the space, they won’t put their feet on the table.
- We have to know when to intervene and when to wait. Limited intervention by the adult, is a Montessori pillar. Maria Montessori is very clear about when to do that.
- HOW to do that requires practice and learning. Maria Montessori is clear that we need to have expectations and know what they are and parents need to have the same expectations in the family, as do the teachers in a class.
- Adolescents know their parents well. They know which parent to speak to about what. Never be afraid of saying “NO” when no is needed. If you don’t say ‘no’ when needed, you are abandoning the child.
- The adolescent needs adult work – not only practical life like baking and cleaning – they have been doing that for 12 years, creating their potential. Now they need to realise their potential. Their work needs to be relevant to their life.
- The mathematics need to be applied. If their schoolwork is not relevant or applicable to their life, they will not be interested in it. They need to b able to use the information they are learning.
- The freedom of the community now overrides the freedom of the individual. They need to run their own community life. And the roll of the adult is to help them to do it by themselves. Help us to do it by ourselves.
- The adult needs to decide if they are ready to allow their child this freedom.
- Freedom is not a reward. It is not something that can be earned. (For example, when you are done, you may….) This kind of freedom is conditional, but in Montessori, our goal is for the child to have active freedom of choice. This will allow the adolescent to live their life to their highest potential.
- The child needs to be challenged in order to change themselves and adapt. But this is not a freedom from conditions, but the freedom to take a stand from the conditions that you face.
- Work has to be there, but there also has to be a social context. When the adolescents live, work, and study together, they experience that they have a duty that comes with the freedom. They have a new awareness. They had one individual life, but now they have a group awareness and a duty to society.
- Adolescents plan projects in their community meetings. So much happens through dialogue. Their plans are supported by the adult with their adult experience. We support the adolescent to understand possible consequences because they are very optimistic.
- They learn to make choices and they learn to think about the things that matter. Some choices are significant or insignificant. The adolescent may feel ask, “what difference will it make in 100 years?” They start to pay more attention to what does matter and less attention to what doesn’t.
- Their freedom is a conquest, a point of arrival, not a point of departure.
- Freedom allows children to enjoy their environment to the fullest. discipline can turn this enthusiasm into motivation to explore deeper worlds they hadn’t thought of before. Freedom and discipline are beautiful friends.
- There is a difference between “freedom FROM” and a “freedom TO”: the freedom from is coercion; the freedom to shapes one’s own life and give it significance.
- Adolescents need freedom from their parents. They still love them, but they need to increase their self-respect, confidence, and participation in society.
The child is the victim of events but have the clarity of vision to direct and shape the gutter of human society.” – Dr. Maria Montessori, Education for a New World, introduction
Adults get so involved in their own self-importance and adult attitude, but please try to practice self-discipline. Act as if you are being observed every moment by a child and do your best to practice self awareness and social awareness.
Even when you are alone, try to practice the same freedom and limits with yourself that we expect for the child. If you finish your work, look around to see if anyone else needs help. If you want to go to your sports practice, but your husband is overwhelmed with his studies, then perhaps stay home to cook dinner for your family, without even mentioning the sports practice.
More about Jenny’s work HERE
Thank you for reading!